From your dashboard, look for the orange beacon on the Manage My SPARK button in the left sidebar. That beacon is your signal that your SPARK has not yet been configured. Click it to open the Manage My Spark page and get started.
Your Sparks Tab
When you click Manage My SPARK from your dashboard sidebar, you’ll land on the Manage My Spark page with the Sparks tab active. This is your home base for managing all your widgets.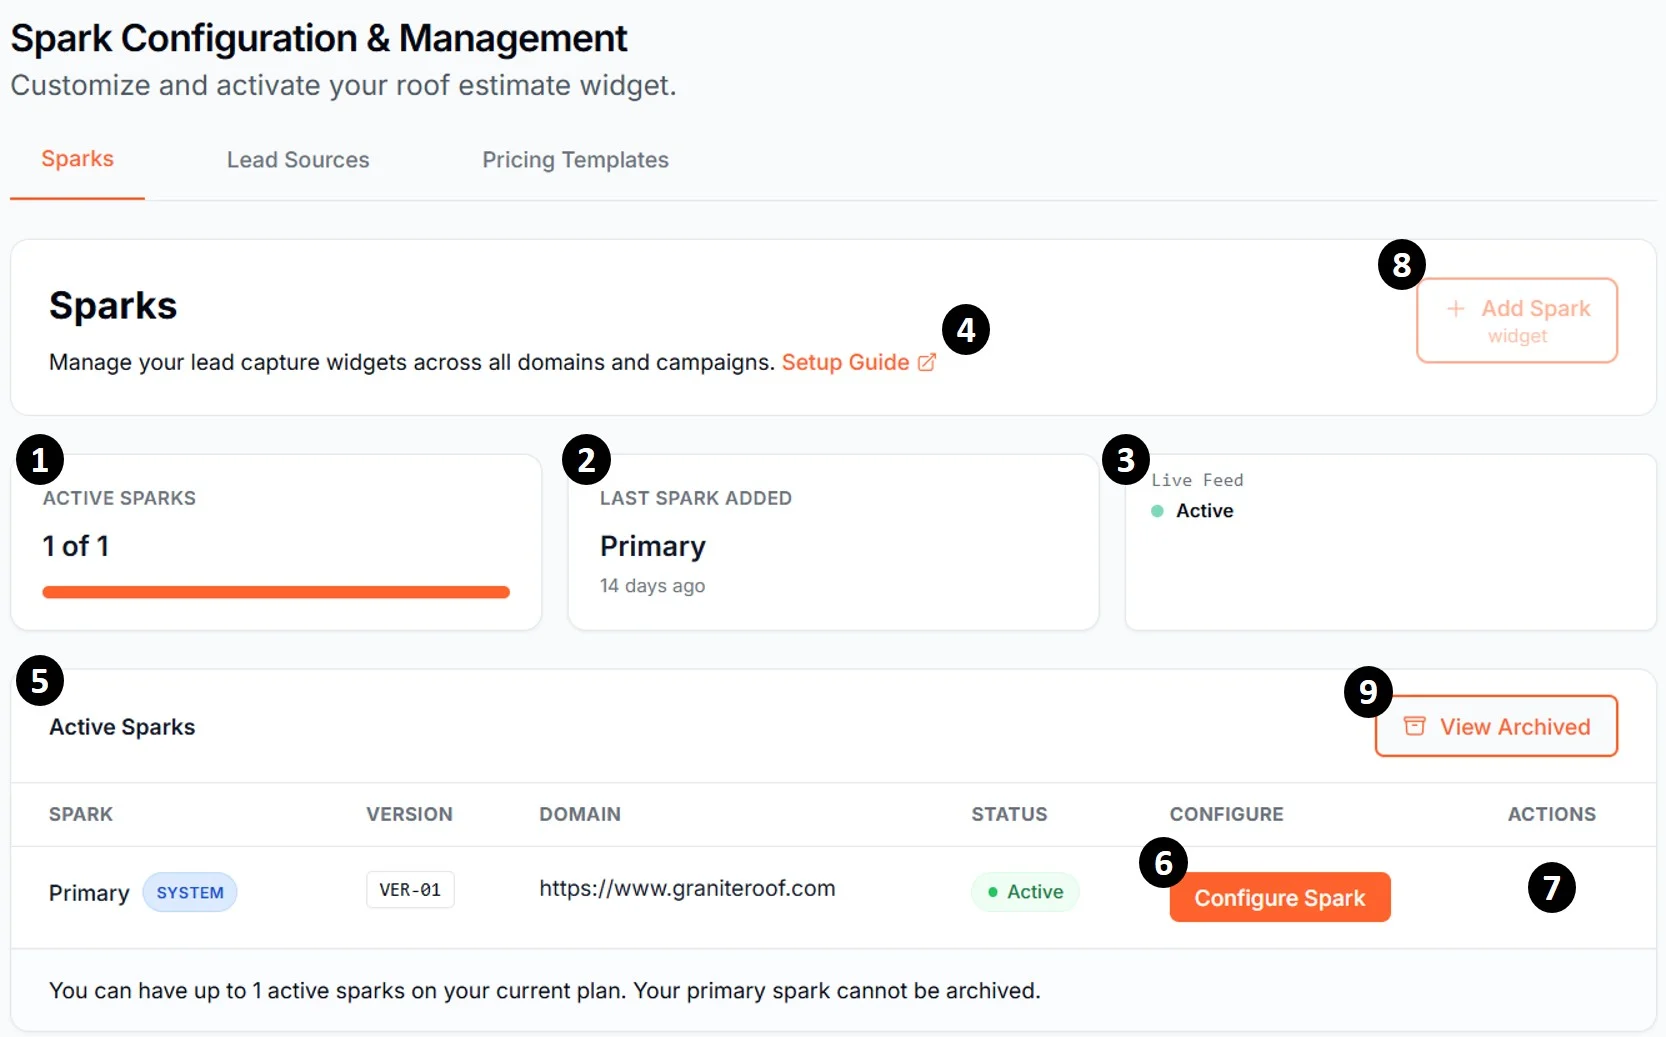
- Active Sparks card — shows how many widgets you have configured and your tier limit (e.g., “1 of 3”)
- Last Spark Added card — shows when you most recently added a widget
- Live Feed card — real-time status indicator showing whether your widgets are live and capturing leads
- Setup Guide link — opens this guide in a new tab
- Active Sparks table — lists each configured widget with its name, version, domain, status, and actions
- Configure Spark button — opens the configuration wizard for that widget (Steps 1-4 below)
- Actions menu (…) — archive a widget (non-Primary widgets only), rename, and other per-widget options
- + Add Spark button — create a new widget; available based on your subscription tier
- View Archived button — switch between active and archived widgets
Subscription Tier and Widget Limits
The number of widgets you can have active depends on your subscription — up to 5 widgets depending on your tier. If you reach your tier’s active widget limit, the + Add Spark button shows an upgrade tooltip. You can archive a non-primary widget to free up a slot, or upgrade your plan.When You Click Configure Spark
Click Configure Spark on any widget row to open the four-tab configuration wizard:- Branding — your company info, logo, colors, and widget title
- Pricing — your base price, estimate range, and optional advanced adjustments
- Website Button — design the button or banner that opens your SPARK
- Publish — enable your widget, retrieve your install script, and get your QR codes
Before You Begin
When you click + Add Spark widget to create a new Spark, or click Configure Spark on your Primary widget for the first time, you’ll see the Get Ready to Create Your SPARK checklist modal. Have the following ready before you proceed — you’ll need all four to complete setup.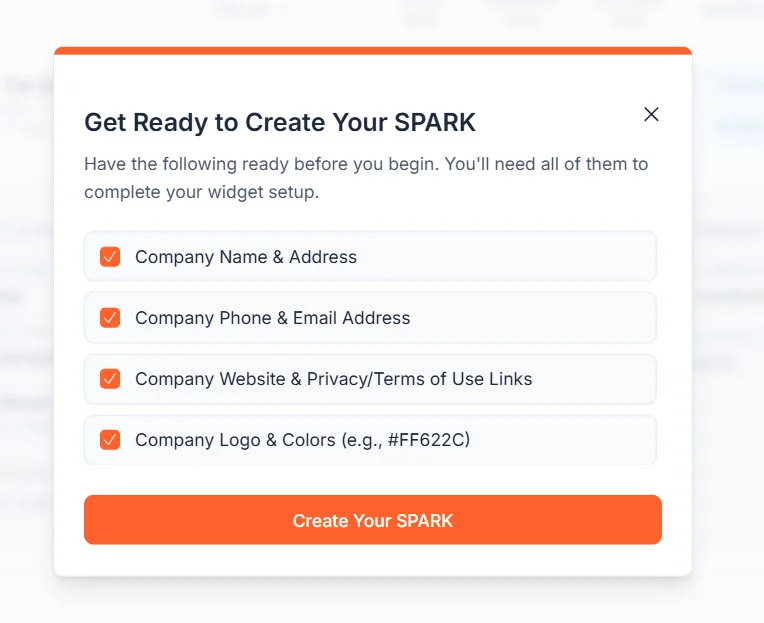
- Company Name & Address
- Company Phone & Email Address
- Company Website & Privacy/Terms of Use Links
- Company Logo & Brand Colors (HEX format, e.g.,
#FF622C)
Step 1 — Branding
The Branding tab controls how your company appears to homeowners throughout the widget experience. Work through each section from top to bottom, then click Submit at the bottom of the tab when you’re done.Company Info
Enter your company’s contact details. This information is displayed to homeowners inside the widget, so use the phone number and email address your team monitors for customer inquiries.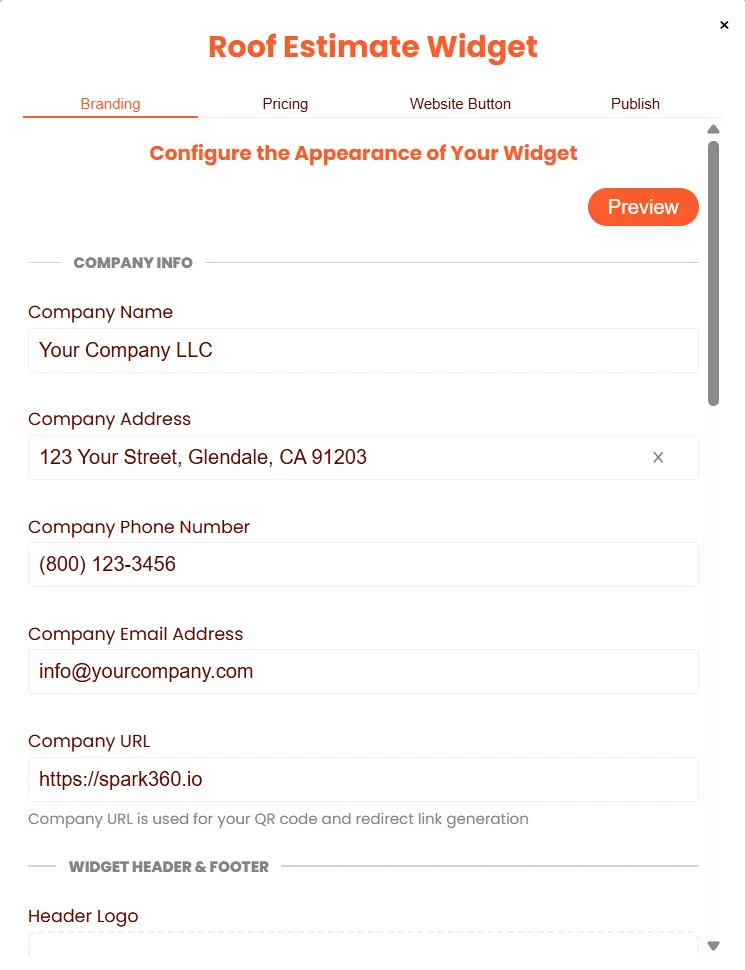
| Field | What to enter |
|---|---|
| Company Name | Your business name as you want it displayed |
| Company Address | Your primary business address |
| Company Phone Number | The number homeowners should use to reach you |
| Company Email Address | A monitored customer-facing email address |
| Company URL | Your primary website (e.g., https://yourcompany.com) |
Your Company URL is used to generate your QR code and redirect links in the Publish tab.
Logo Upload
Scroll down to the Widget Header & Footer section. Upload your company logo for both the header and footer of the widget.- PNG or JPG (recommended)
- Horizontal layout preferred (e.g., 300 × 150 px)
- Max file size: 1 MB
- Avoid tall or vertical logos
- Use a transparent background if possible
- Make sure your logo is legible on both light and dark backgrounds
Legal Links
Enter the URLs for your company’s Privacy Policy and Terms of Use pages. These links appear in the widget footer and are required for homeowners to review before submitting their information.| Field | What to enter |
|---|---|
| Footer Privacy Policy Link | Full URL to your privacy policy page |
| Footer Terms of Use Link | Full URL to your terms of use page |
http:// or https://. We recommend opening the relevant page on your website and copying the URL directly from your browser’s address bar.
Don’t have a privacy policy or terms of use page yet? You may use the Spark360 fallback links in the meantime:
- Privacy Policy: https://www.spark360.io/privacy
- Terms of Use: https://www.spark360.io/legal-v2
Widget Title & Colors
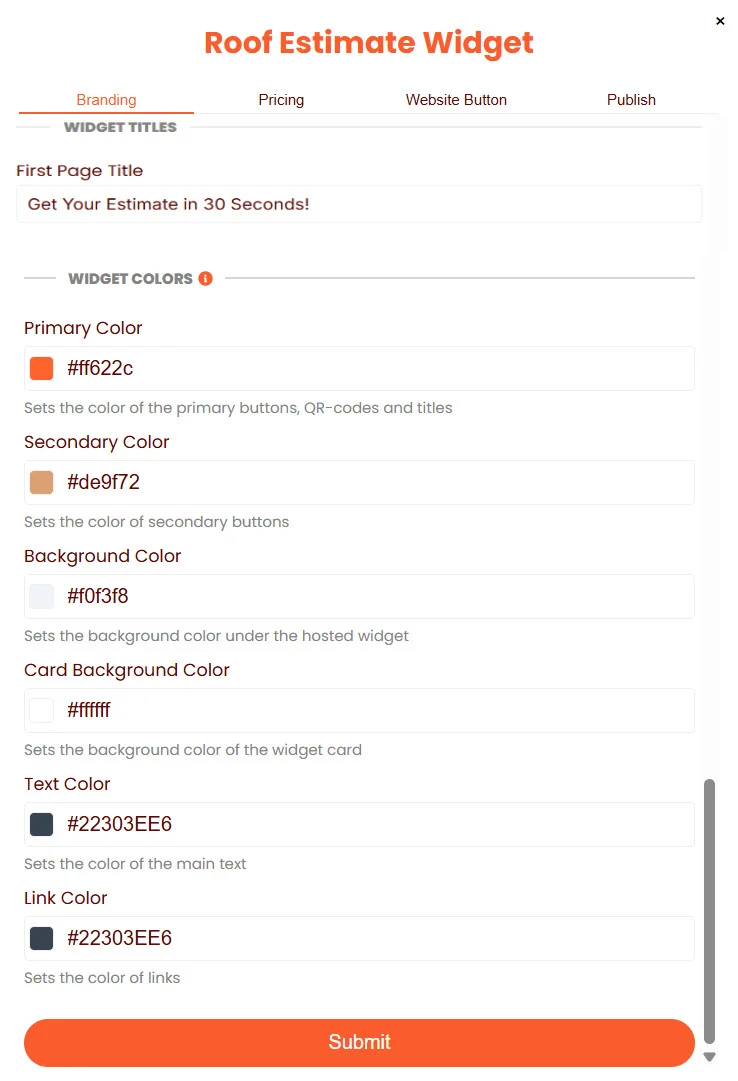
- Get Your Estimate in 30 Seconds!
- Get an Instant Roof Estimate
- Free Roof Estimate — Try It Now
| Field | Controls |
|---|---|
| Primary Color | Primary buttons, QR codes, and titles |
| Secondary Color | Secondary buttons |
| Background Color | Background behind the hosted widget page |
| Card Background Color | Background of the widget card itself |
| Text Color | Main body text |
| Link Color | Clickable links |
Step 2 — Pricing
The Pricing tab configures how your SPARK calculates roof replacement estimates for homeowners. Work through each section, then click Submit at the bottom when you’re done.Base Price Configuration
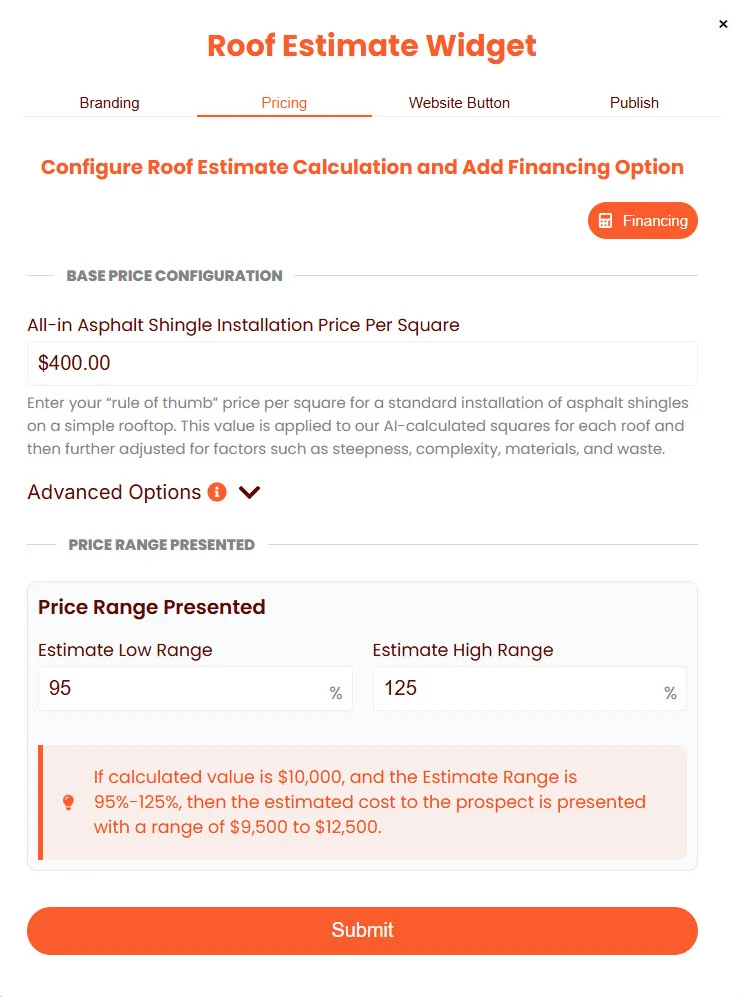
Advanced Options (Optional)
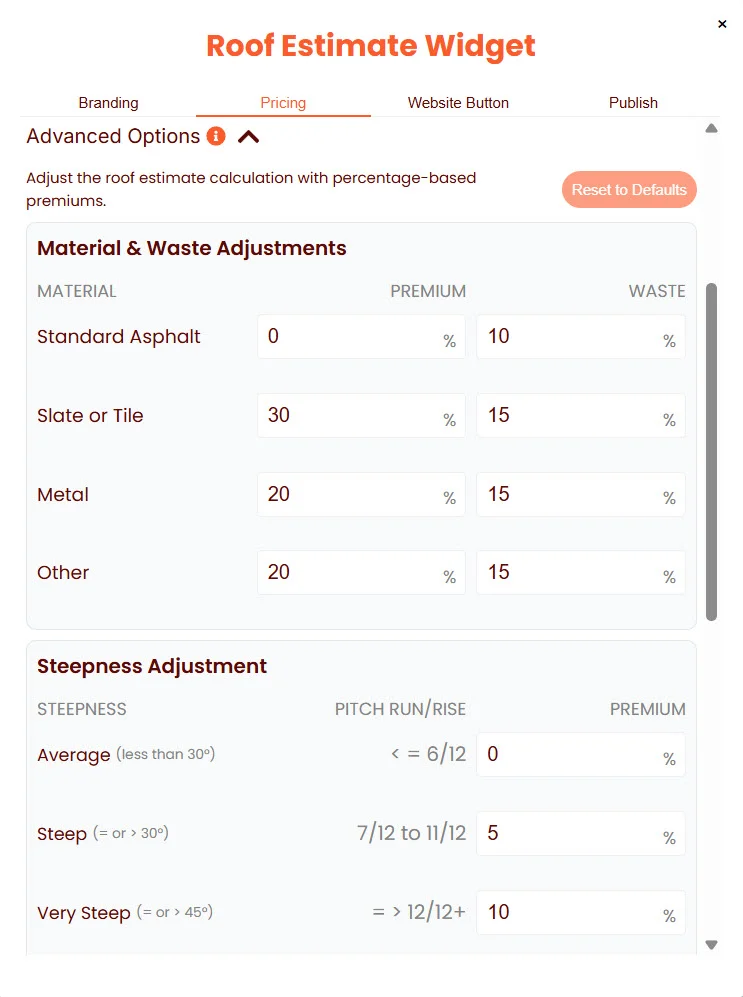
- Material & Waste Adjustments — Set a premium and waste factor for each material type (Standard Asphalt, Slate or Tile, Metal, and Other). The premium is the additional cost percentage applied over your base price for that material; waste accounts for the extra material needed during installation.
- Steepness Adjustment — Apply a premium based on roof pitch. Steeper roofs require more labor and carry higher risk, so you can set graduated premiums for Average, Steep, and Very Steep pitch ranges.
- Complexity Adjustment — Apply a premium for roof complexity (scroll down within Advanced Options to view this section).
Financing — Payments As Low As (Optional)
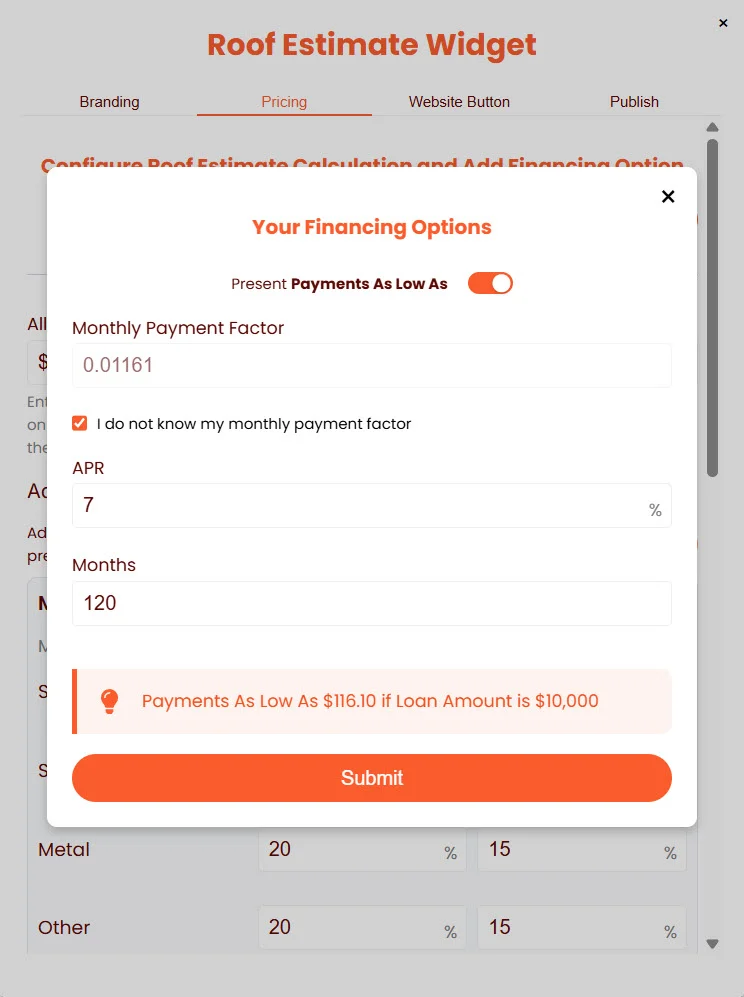
Only enable this feature if you currently offer financing options to customers. This figure is for illustration purposes in the widget — your actual financing terms are handled outside of Spark360.
Enter your financing terms
Enter either:
- Your Monthly Payment Factor (provided by your lender), or
- Check I do not know my monthly payment factor and enter your APR (%) and loan term in Months instead. Spark360 will calculate the factor for you.
Step 3 — Website Button
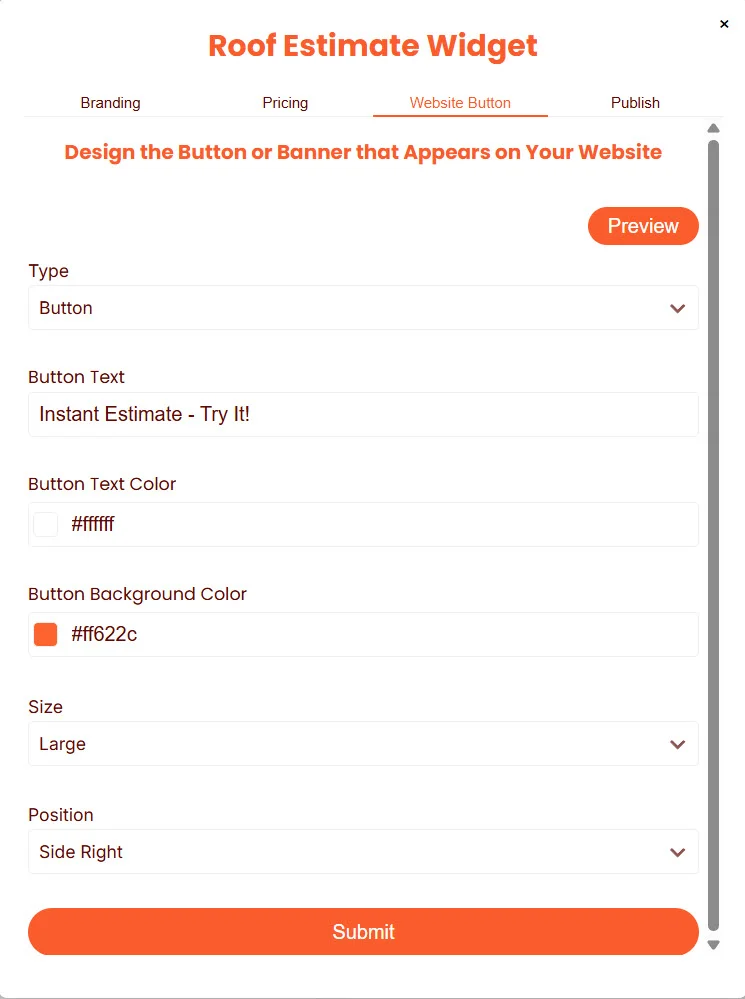
The Website Button tab lets you design and configure a button or banner that appears on your website to invite visitors to get a free estimate. This element is automatically generated — no design work required.Design Your Button or Banner
| Field | Description |
|---|---|
| Type | Choose Button, Banner, or Custom |
| Button Text | The text that appears on the element |
| Button Text Color | Text color (HEX code) |
| Button Background Color | Background color of the button or banner (HEX code) |
| Size | Small, Medium, or Large |
| Position | Where the element appears on your website (e.g., Side Right, Bottom Left, Top) |
Preview Your Options
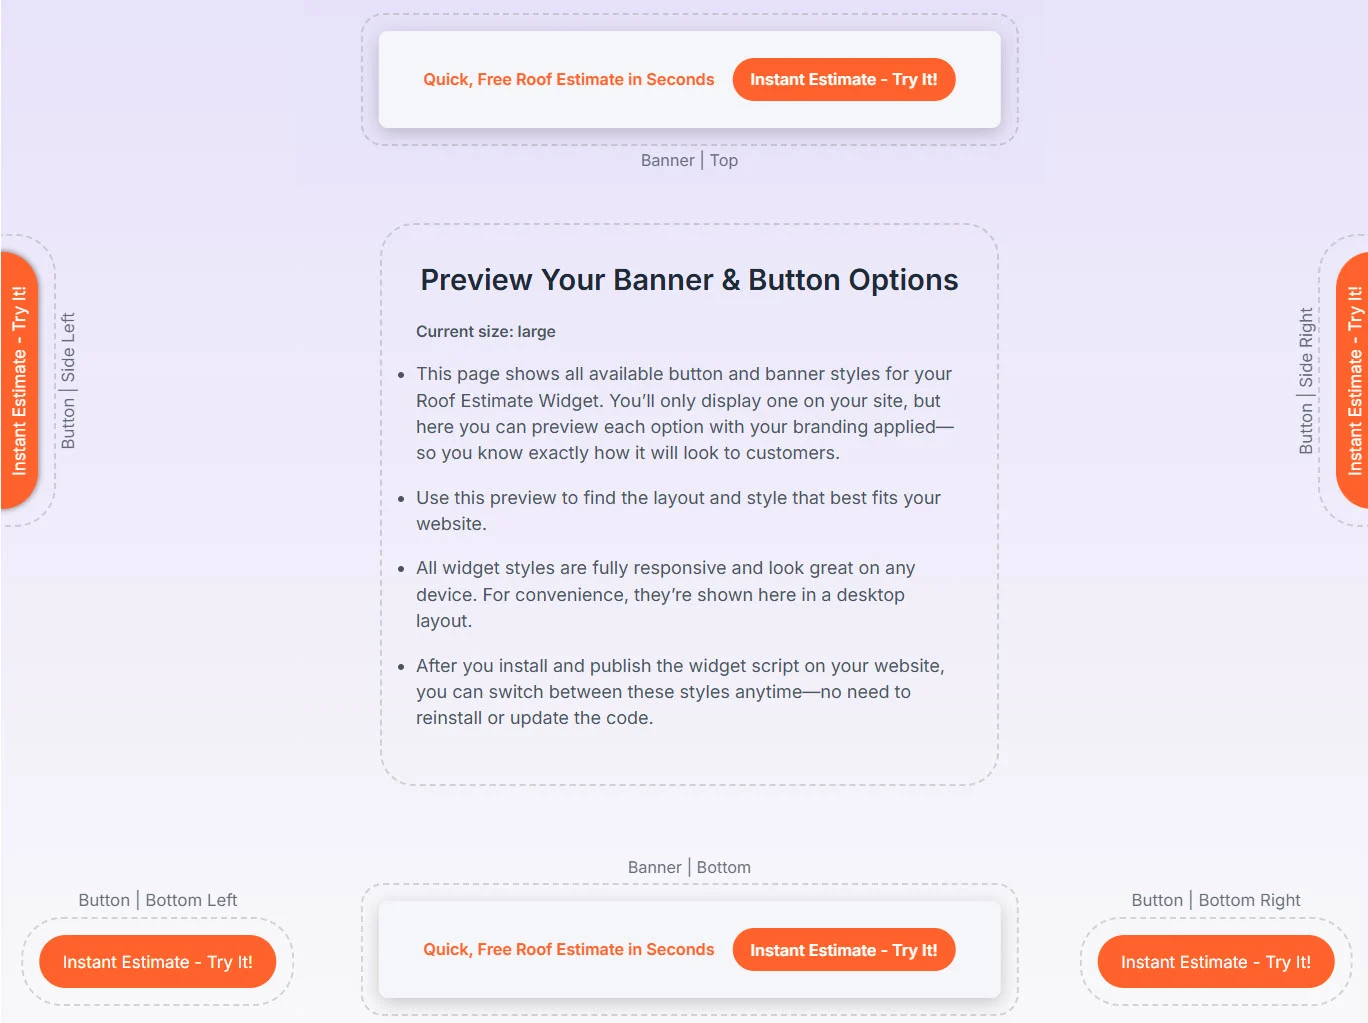
After your widget script is installed on your website, you can switch between button and banner styles at any time — no need to reinstall or update your script. Your configuration change takes effect immediately.
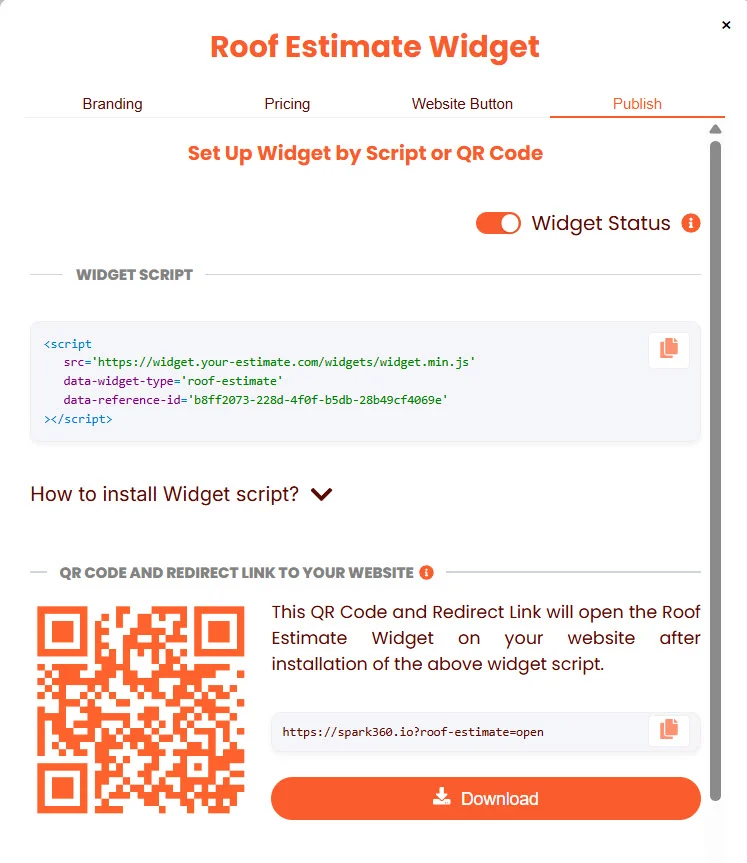
Step 4 — Publish
The Publish tab is the final step. This is where you activate your SPARK, retrieve your install script, and access your QR codes and redirect links.Enable Your Widget
| Status | Meaning |
|---|---|
| Enabled (Active) | Your SPARK is live and capturing leads in real time |
| Paused (Inactive) | Your SPARK is offline — all links and buttons will not activate the widget |
Install the Widget Script
Your unique widget script is displayed in the Widget Script section. This script is what makes your SPARK appear on your website. Use the one-click copy button to copy the script, then provide it to your website manager or paste it yourself. Where to paste the script: Add the script at the end of the<body> tag, or into the Footer Code section of your website builder (e.g., Webflow, Wix, Tilda, Squarespace). This ensures your page is fully loaded before the SPARK runs.
To see step-by-step installation instructions, click the “How to install Widget script?” link directly below the script. This expands a panel with full instructions, including how to wire a custom button or banner element.
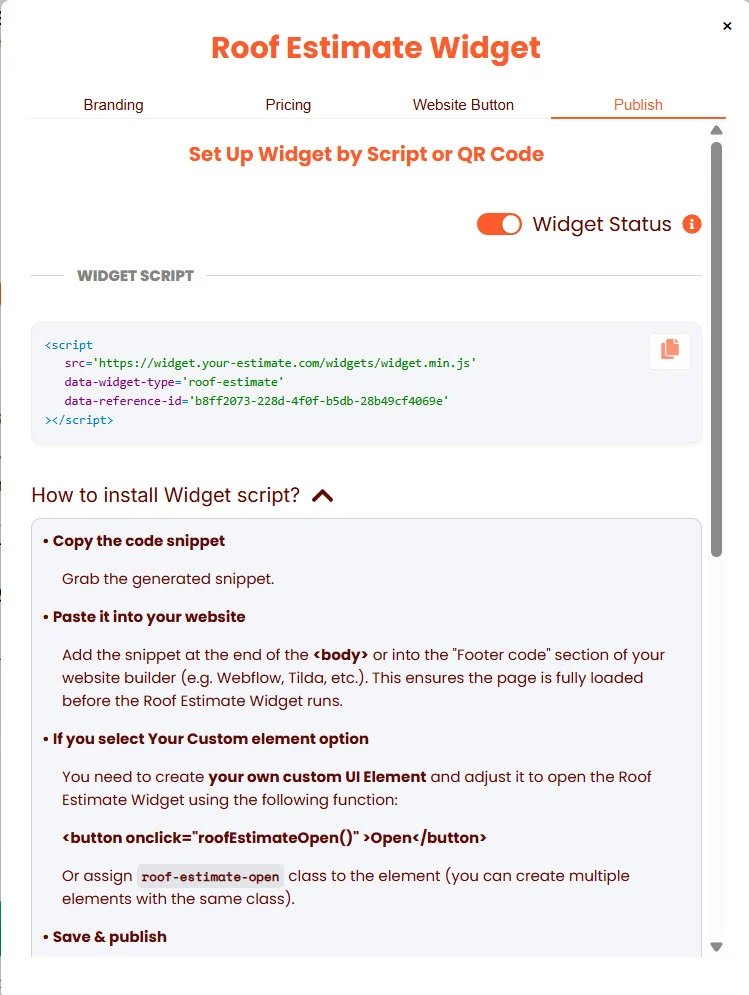
roof-estimate-open class to any clickable element:
roof-estimate-open to multiple elements on the same page.